

You’ve heard us say it repeatedly because it remains true every season: healthy soil is essential for healthy grass.
Whether you’re laying new sod or planting seed, we always recommend conducting a soil test for your lawn before spreading fertilizer or balancing the pH in your soil. Then, we recommend conducting a yearly soil test before you give your existing grass a dose of nutrients.
When you receive the the soil test report, you may be surprised that your soil is deficient in just a few nutrients or that you don't need to add lime because the soil pH is acceptable. Our grasses have different nutrient and pH requirements, and a soil test gives you the feedback you need before purchasing unnecessary soil amendments.
If you haven't read our compelling information regarding Why Soil Testing is Important, please do so before reading the rest of this article teaching you how to take a soil sample for a soil nutrient test.
Tools for Conducting a Soil Test
You’ll only need a few simple tools to gather soil samples for your soil test.
- Digging Tool: Use a clean garden trowel, shovel, or soil probe. Be sure to clean your sampling tool before taking samples because fertilizer or soil residue could give inaccurate results.
- Container: Use a plastic container, bowl, or bucket because metal can skew your test results.
- Ruler: Use a ruler or tape measure to measure hole depth.
- Marker: Use a marker, such as a Sharpie, or pen for labeling your sample bags
- Paper or Plastic Bag: You’ll need this to send your soil off for testing. Most testing services will provide a bag.
If you're a Lawn Coach customer, you will be sent all these tools (soil probe, ruler, pen, bag), except for the plastic container.
Where to Take Soil Samples for a Soil Test
Your lawn is diverse and likely doesn’t have the same chemistry across the board. Identify areas with similar characteristics and take soil samples from each of these areas.
Some examples are:
- Main lawn area
- Shady areas near big trees
- Right side of front yard, left side of back yard, etc.
- Areas where you’ve had grass problems in the past
Take soil samples from different areas to get the best soil test results. Clearly label your bags and note where each soil sample came from so you can match the area with the soil test report.
How to Conduct a Soil Test
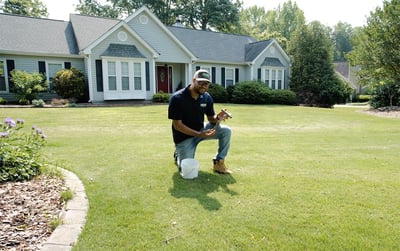
Let’s begin taking soil samples! The video shows you how to take soil samples and here are the written steps:
- Using your clean garden trowel or shovel, dig a small hole 4 inches deep. If you’re using a soil probe, insert it at least 4” deep. Sometimes it makes it easier to dig into hard, clay soil if you moisten it the day before.
- Remove the top layer of grass, thatch, and roots. Scrape the edge of the hole with your trowel and scoop the loose soil into your plastic container.
- Remove any grass blades, roots, or any other organic material from your container.
- Working in a zig-zag pattern, repeat this process 6-10 times per area you wish to be sampled. The more samples you take, the more accurate representation of the area will be given.
- Once you’re finished sampling the area mix the soil in your container. Mixing the samples from each hole will give an accurate representation of the whole area. This is called your composite sample.
- If your soil sample is damp, leave it in the container to air dry.
- Label your soil sample bag or bag of your own with your name, address, lawn type, and sampled area (i.e. front lawn, back yard, right side, left side, etc.)
- Fill your bag with dry soil to the recommended fill line. If you’re using your own bag, fill it with approximately 2 cups of soil.
- Package up your bags of soil and send them off to the lab for soil testing.
Repeat this process if you sampled more than one area and be sure to label them differently. If you have more than one area to sample, rinse your container and trowel between areas to remove residue that might skew soil test results.
Where to Send Your Soil Sample to be Tested
We like Waters Agricultural Labs testing procedures and service. If you give them a call they’ll mail you a testing kit that includes bags.
If you would prefer an option that’s closer to home, your local cooperative extension service will provide soil test bags. If you don’t want to make a special trip to pick up a testing bag, you can always switch to their official testing bags once you get to the office.
The Lawn Coach team can help make this part hassle free. Each Lawn Coach Welcome Kit includes an envelope with pre-paid postage. All you’ll need to do is place your sample and in the envelope and mail it off. Lawn Coach will receive the lab test results and give you expert direction on any soil adjustments that need to be made.
When to Conduct a Soil Test
It is recommended that lawn soils be tested at least once a year and, while soil tests can be taken any time of year, there are some timing factors to consider:
- Lime: Some soil amendments like lime can take a few months to increase soil pH so don't test pH right after you apply lime.
- When Laying Sod: We recommend conducting a soil test as soon as you can before laying sod so you have the feedback you need to correctly amend your with lime, compost, or fertilizer.
- When Planting Grass Seed: Same thing, do the test well before you plant your grass seed so you get the correct amendments to incorporate when you spread your seed.
Understanding Soil Test Results
Receiving your results from the lab may take a few weeks, depending on the time of year. Once the feedback in a soil report enlightens you about the pH and nutrient levels, recommendations and adjustments can be made so you'll have the most beautiful lawn possible!
To understand the test results and what kind of soil amendments you may need, educate yourself by reading these guides:
- Why Soil Testing is Important
- How to Calculate Fertilizer Rates
- Understanding Lawn pH
- Look up the Lawn Maintenance Guide for your type of grass
It may seem complicated, but don't get overwhelmed. Our Lawn Coach team is expert at analyzing soil reports and giving recommendations so consider signing up. We’ve done thousands of soil tests on our sod farms and are here to help you complete your own with ease.
When you order your sod, you can also order the right amounts of compost, lime, or fertilizer based on the results in the soil test report.
Got questions? Leave a comment below!