
A hard freeze lasting for hours under 28 degrees can damage hoses, sprinklers, and hand sprayers. Speaking from experience, it is so frustrating to discover that they are broken when you go to use them! By taking a little time now to winterize your irrigation, you can save yourself the annoyance and extra work.
Winterizing In-Ground Irrigation Systems
Pop-up sprinkler heads and pipes should be fine because the ground insulates them, but you may need to drain the system. Check with the manufacturer recommendations, the person who installed your irrigation, or your landscaper to see if there are winterizing instructions for your in-ground irrigation system.
Winterizing Above-Ground Irrigation Systems
Above-ground irrigation systems are much less expensive to install, but they require more winterizing. Here are the steps I take to winterize my above-ground, spigot-and-hose irrigation system near Atlanta in gardening zone 8a:
- Winterizing Hoses: Drain the hoses so they don't burst, but in my experience, it's okay to leave them outside if you don't have a shed, shop, basement, or garage to store them in. All you have to do is unhook them from the spigot so water drains out of both ends.
New Sod & Tall Fescue: Hoses do seem to last a little longer if you bring them inside for winter, but if there are dry spells, you may need to keep them outside and convenient for watering new sod or actively growing Tall Fescue lawns. - Winterizing Sprinklers & Sprayers: Bring hose-end sprinklers and hand sprayers into a shed, etc., to keep them dry during winter so they don't burst and break. I find that unhooking them but leaving them outside does not preserve them—water collects in the small parts, freezes, expands, and busts them up. It's best to bring them inside.
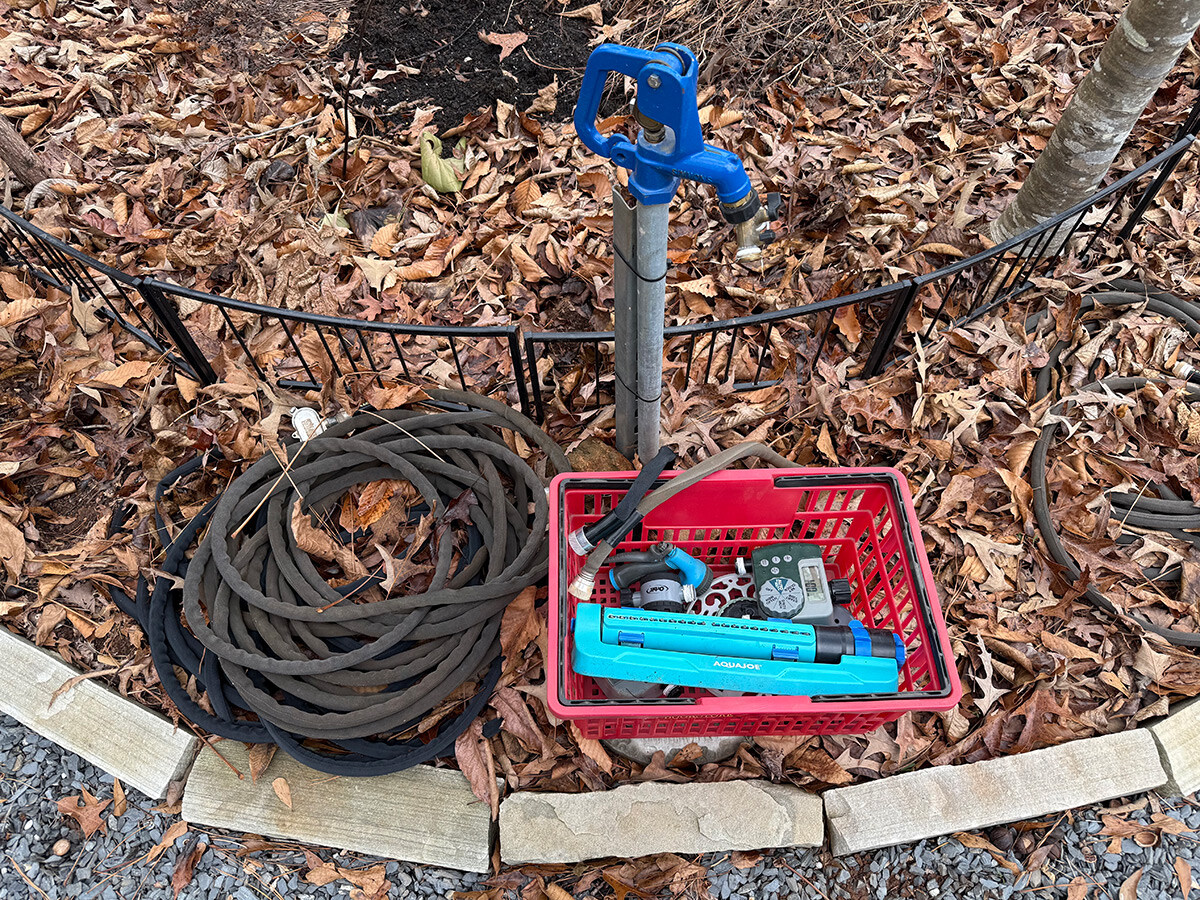
New Sod & Tall Fescue: It's best to bring them inside, but keep them handy if you need to water new sod or actively growing Tall Fescue during a dry spell. I put all mine in a big basket, as shown in the top picture, and I keep the basket by the basement door. - Winterizing Spigot Timers: Remove irrigation timers attached to spigots and store them in a shed, etc. Timers with batteries benefit from being stored in a non-freezing room or building. In my experience, batteries left outside all winter no longer work the following season. The entire timer lasts longer when protected from the elements during cold, frosty months.
New Sod & Tall Fescue: It's best to bring timers inside, but keep them handy if you need to water new sod or actively growing Tall Fescue during a dry spell. - Winterizing Spigots: Insulate spigots to prevent them from bursting. Where I garden in zone 8a, leaving one faucet or spigot dripping is enough to protect the entire system during the coldest nights. If you live in a colder area or have had trouble with bursting spigots, consider purchasing an insulating spigot cover.
Here is a spigot cover from Home Depot; they call it an Outdoor Faucet Cover.
I hope these four steps have shown you how winterizing irrigation before cold weather is not only simple, but that will save you time, money, and frustration later.
In gardening zone 8a and warmer, where freezing temperatures are less extreme, those precautions are often sufficient to safeguard your irrigation setup. However, it’s important to stay prepared for dry spells, especially if you have new sod or an actively growing Tall Fescue lawn that may need occasional watering.
In any climate, keeping essential equipment like hoses, sprinklers, and timers accessible-but-protected allows you to maintain the health of your lawn and garden when the tools are needed.


